How to Plaster a Drywall: A Beginner’s Guide
How to Plaster a Drywall
Plastering an interior wall (drywall) can improve rough surfaces into smooth, paint-ready finishes. For Kiwi homeowners tackling small GIB® stopping projects or drywall repairs, learning how to plaster can save money and be very rewarding. In this step-by-step guide, we’ll cover everything from the essential tools and preparation to applying plaster in coats and achieving a polished result. By following these tips, you’ll be able to plaster a plasterboard wall with confidence. We will also advise when it’s best to call in professional plasterers. Let’s get started!
Call us at 021446716Request A free Quote Today!
Tools and Materials You’ll Need
Like any project, having the right tools and materials is key to effective plastering. Before you begin, gather the following essentials:
- Plastering trowel: A high-quality stainless steel plasterer’s trowel is critical. This flat tool is used to spread and smoothen plaster on the wall. A mid-sized trowel is ideal for beginners, as it’s easier to control for an even finish. Don’t skimp on quality, as a good trowel will help you achieve the results you deserve.
- Hawk (hand board): This is a flat board with a handle, used to hold plaster as you work. A lightweight foam or plastic hawk is great for beginners because it’s easier on the arms when loaded with plaster. You scoop plaster onto the hawk and then onto your trowel.
- Bucket trowel: A smaller, scooped trowel designed for transferring plaster from the mixing bucket to your hawk. It isn’t used on the wall directly, but it makes moving plaster much easier and cleaner.
- Mixing equipment: You’ll need a large clean bucket and a power mixer to mix plaster and water. An electric drill with a mixing attachment will save you time and ensure a smoother plaster mixture compared to mixing by hand. Always use clean water and a clean bucket, as old residue can cause plaster to set too fast.
- Water brush & cleaning tools: A broad water brush is used during finishing to dampen edges and keep your work smooth. Also have a smaller hand brush or sponge for cleaning your tools and any spills. Keeping tools clean throughout the process is important.
- Protective gear: Plastering can be messy, so wear old clothes or coveralls. It’s wise to use safety glasses when mixing to guard against splashes and a dust mask when sanding or handling dry plaster powder. Lay drop cloths on floors to catch dripping and make cleanup easier.
Preparing the Wall for Plastering
As the saying goes, “failing to prepare is preparing to fail.”
Taking time to ready your wall will ensure the new plaster bonds well and doesn’t later flake or fall off. Follow these preparation steps before you mix any plaster:
- Remove any wallpaper or flaking paint: If the wall has old wallpaper, you must strip it completely. Plastering over wallpaper will end in disaster, as the wet plaster can cause paper to peel, leading the new plaster to bubble and fall off as the paper lifts. Use a scraper and warm soapy water to remove all traces of wallpaper. This task is tedious, but absolutely necessary to avoid ruined plaster down the track. Likewise, scrape off any loose or flaking paint so that you’re working with a stable surface.
- Wash and clean the surface: It’s often helpful to wash the wall with sugar soap or a mild detergent solution to remove grease, dust, and grime. Any dirt or film on the wall can prevent plaster from adhering properly. For example, a thin layer of ceiling grime or cooking oils could cause fresh plaster to lose its bond, as one plasterer learned when an entire plastered ceiling fell down due to unseen grease!
- Apply scrim tape to cracks and joints: Inspect the wall for any cracks or the joints between plasterboard sheets. Cover these with plasterboard joint tape (also called scrim tape) before plastering. Scrim tape is a self-adhesive mesh that reinforces seams and cracks. It allows a bit of movement and helps prevent your plaster from cracking along weak lines. Press tape over every joint between boards and any existing hairline cracks in the wall. This way, as the house naturally shifts over time, the tape will absorb tension and keep the finished plaster intact.
- Seal the wall with PVA primer: Most plasterers apply a coat of PVA glue mixture to the wall before plastering, especially on high-suction surfaces like old bare plaster, brick, or porous drywall. PVA (polyvinyl acetate) acts as a plaster primer and sealer which regulates the wall’s absorption rate and improves adhesion. Essentially, PVA seals the substrate to prevent it from sucking moisture out of the wet plaster too quickly.
Mixing Plaster Correctly
With the wall prepared, it’s time to mix your plaster. Getting the mix right is important. Too thick and it will be unworkable; too runny and it won’t hold to the wall. Here are general tips for mixing a batch of gypsum plaster also called wallboard joint compound or plaster finish coat:
- Measure water first: Start by filling your clean bucket with cool, clean water. A common rule of thumb is about 11-12 litres of water per 20 kg bag of plaster, but follow your product guidelines. Always pour water in before the plaster powder.
- Add plaster to water gradually: Sprinkle the plaster powder into the bucket of water in stages, rather than dumping it all at once. Add roughly one-third of the bag and mix with your paddle, then add the next third and mix, then the final portion. This staged mixing helps prevent dry lumps and ensures all plaster is wetted evenly.
- Mix to a creamy consistency: Use a power mixer on low-to-medium speed. Move the paddle around and mix for a few minutes until the plaster is smooth and free of lumps. You’re aiming for a consistency similar to melted ice cream. It should be thick enough to stay on your trowel without sliding off when held level, but thin enough to spread easily. If the mix seems too stiff like peanut butter, add a small splash of water and mix again. If it’s too runny, sprinkle a bit more plaster powder and mix. Tip: Never mix more plaster than you can use in about 20-30 minutes. Plaster will start to set in the bucket, and you don’t want to waste a big batch. It’s better to mix in smaller amounts as needed when starting out.
- Clean between batches: Any hardened bits left in the bucket or on tools can accelerate the setting of the next batch. Wash your bucket and mixer quickly between mixes if you need to prepare a fresh batch. Also check the plaster’s “use-by” date; old plaster powder that has been sitting around damp can set too fast or unpredictably. Use fresh plaster for best results.
Applying Plaster to the Wall
Plaster is typically applied in two coats to get a solid, even coverage on a drywall or plasterboard surface. Below is a breakdown of the plastering steps:
- First coat (“scratch coat”): Load your hawk with plaster from the bucket using the bucket trowel. Then pick up a good amount of plaster on your plastering trowel. Starting at the bottom of the wall, push the plaster onto the wall with a firm upward stroke. Aim to cover about 1-2 square metres at a time. The first coat should be about 2 mm thick and doesn’t need to look perfect. Get it on reasonably evenly, then go back and smooth it a bit. Continue this process, working in manageable sections, until the entire wall is covered in the first coat. Keep your strokes consistent and don’t worry about some trowel lines at this stage. If you are plastering a large area, do it in segments but keep a wet edge (don’t let one area dry out completely while adjacent areas are still being applied). Once finished, the wall will look rough but that’s okay.
Tip: After covering a section, you can gently run the clean edge of your trowel over it (without adding new plaster) to flatten any ridges or high spots. This is called ruling off. Let the first coat firm up for a short while (around 15-20 minutes) until it’s starting to set but is still damp. This is a good time to wash off your hawk and tools quickly, so old plaster doesn’t harden on them. - Scratch the first coat (if needed): If you have to wait a bit before the second coat, professional plasterers often scratch lines into the first coat to give the next layer something to grip onto. This is done by lightly running a devilling float (a flat tool with nails, or even an old fork) over the semi-set plaster to create shallow grooves. Scratching is mainly important if the first coat has fully hardened or if you’re doing thick plaster. For a single session skim, you might skip this because the second coat goes on while the first is still slightly damp.
- Second coat: Mix a fresh batch of plaster if needed. Apply the second coat of plaster over the first, using the same method. This coat should be thinner and is aimed at filling in any hollows and achieving a smooth surface. Don’t overload the wall. A thin, controlled application is easier to smooth out. After the whole area is covered, you should start seeing a much flatter result. Let this coat firm up for about 20 minutes.
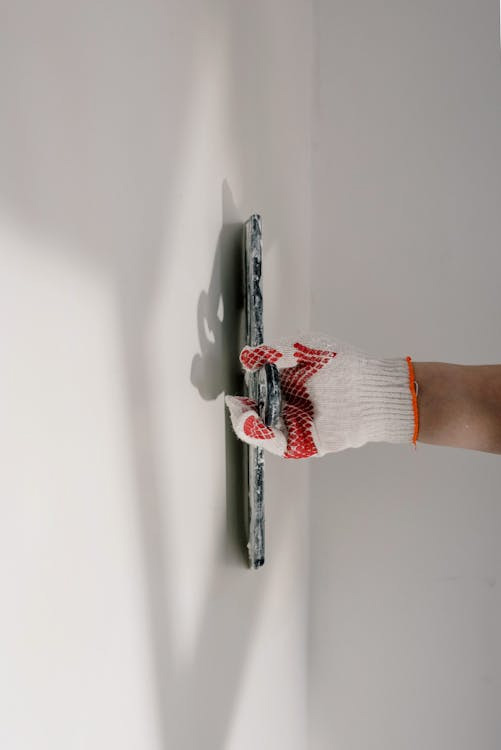
- Trowelling and smoothing: Now comes the finishing stage, which actually happens in a couple of passes as the plaster sets. As the second coat starts to dry, you’ll notice it loses its wet shine and begins to harden. Go over the wall with a clean trowel in broad, sweeping strokes to flatten any bumps. You might dip your trowel or brush in water and flick or lightly spread a touch of water onto areas that are dragging. This lubricates the surface for a smoother finish. Over the next 10-30 minutes, do another pass, pressing a bit more firmly now that plaster is harder. Each pass should further smooth out trowel marks.
- Finishing and polish: For a very smooth finish, do a final polish pass when the plaster is almost set (it will feel quite firm to the touch). At this stage, a wet paintbrush or water brush is your friend. Brush a little water along edges and any remaining lines, then polish with the trowel using tight, short strokes. The plaster surface can be brought to an even, matte finish with no ridges. Don’t over-polish (i.e., don’t continue once the plaster is fully dry, as that can disrupt it). The goal is a flat, uniform surface ready for painting.
Congratulations! you’ve skimmed your wall. After finishing, clean your tools thoroughly. Never leave plaster to harden on them, or it will be very difficult to remove later.
When to Call a Professional Plasterer
If plastering a large area or achieving a perfect finish feels daunting, don’t hesitate to seek help. While DIY plastering is doable for small jobs, a skilled professional can ensure high-quality, even results with no fuss. In fact, an experienced plasterer can typically finish a room faster and with a glass-smooth appearance that stands out. If you have a full home to plaster, intricate curved surfaces, or simply want a flawless result without the stress, hiring experts is a smart choice. Remember, the cost of fixing a badly plastered wall can be more than doing it right the first time.
Our team at Above Board Interiors includes highly trained plasterboard fixers and stoppers who take pride in immaculate finishes. We handle everything from GIB® fixing to the final skim coat and sanding. And if you’re planning to repaint after plastering, consider using our professional painting services to give your walls the perfect top coat. A seamless surface and quality paint job together will make your interior look like new.
Plastering a drywall involves preparation, the right tools, proper mixing, and technique in applying multiple coatings. With practice, you can achieve a smooth finish ready for paint or wallpaper. But if you’d rather sit back and get guaranteed perfect walls, reach out to us. Our friendly plasterers in Auckland are here to help across the region, offering professional plastering services that save you time and ensure beautiful results. Happy plastering!
FAQs: Plastering Drywall
What is the difference between plastering and GIB stopping?
Plastering can include skim-coating whole walls or even decorative plasterwork, whereas GIB stopping is specifically the trade of stopping/sealing plasterboard linings. Above Board’s team are experts in both, and we often use the terms interchangeably when talking about smoothing interior walls.
Can I plaster over painted or wallpapered walls?
You should not plaster directly over wallpaper. Always remove it first, as discussed above. Interior Plastering over wallpaper or any paper residues can cause the new skim to fail (the moisture makes wallpaper peel, taking your fresh plaster with it). Talk to us about our GIB® fixing solutions if you’re unsure.
How long does new plaster take to dry before I can paint it?
Drying time for plaster depends on thickness, temperature and ventilation. A skim-coat on drywall (2–3mm) will usually dry within 2-5 days under average conditions. Thicker “bonding” plaster undercoats take longer. Sometimes 7-10 days. Always use a plaster primer sealer (mist coat) on new plaster before applying regular paint, which seals the surface and helps the paint adhere properly.